Recently Amazon Glacier Team announced
the new featue called Glacier Vault Access Policies.
Using Access Policies you can easily share your vault(s) with other AWS users. From the tutorial below you
will learn on how to grant access to your vault to another AWS user and how to connect to the vault shared
with you by another user.
Prerequisites: in order to grant access to your vault to another user you need to know their Account Id.
The users may find their Account Id in Account Settings.
To Share the Vault:
1. Start FastGlacier and navigate to the vault you want to share.
2. Click Vaults, Advanced, Access Policy
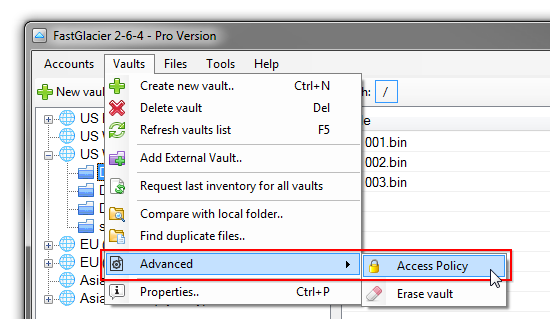
Click Vaults, Advanced, Access Policy to open Policy Editor
Vault Access Policy Editor dialog will open:
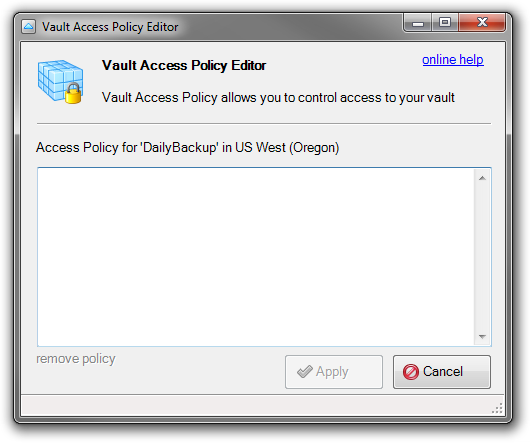
Vault Access Policy Editor
3. Paste the following access policy:
{
  "Version": "2012-10-17",
  "Statement": [
    {
      "Sid": "cross-account-upload",
      "Effect": "Allow",
      "Principal": {
        "AWS": "arn:aws:iam::111111111111:root"
      },
      "Action": [
        "glacier:InitiateMultipartUpload",
        "glacier:ListParts",
        "glacier:UploadArchive",
        "glacier:UploadMultipartPart",
        "glacier:AbortMultipartUpload",
        "glacier:CompleteMultipartUpload"
      ],
      "Resource": "arn:aws:glacier:us-west-2:777777777777:vaults/DailyBackup"
    }
  ]
}
Where 111111111111 is the Account Id of the user you want to share the vault with.
And arn:aws:glacier:us-west-2:777777777777:vaults/DailyBackup is the ARN of the Vault you want to share.
The policy above allows the user with Account Id 111111111111 to upload files into the vault DailyBackup located in US West (Oregon) region.
For full list of allowed actions and policy examples please check
AWS Documentation.
If you paste the policy into the Policy Editor, the Vault Arn is updated automatically.
4. Click Apply to save changes
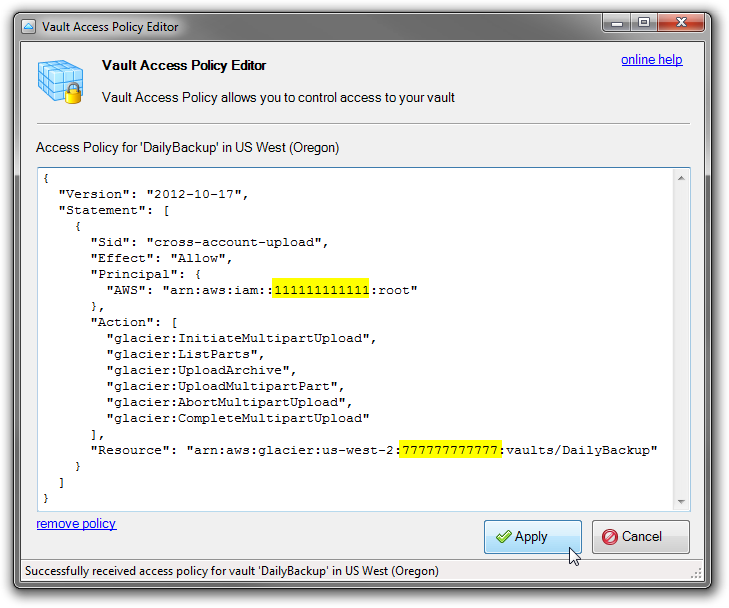
Click Apply to save changes
5. Send the following details to the user you shared the vault with:
-
Vault Name - the name of the vault you shared (DailyBackup in our example)
-
Vault Region - the region where the shared vault is located (US West (Oregon) in our example)
-
Account Id - your Account Id (777777777777 in our example)
The user may follow instructions below to access the vault
(permanent link).
To Access Shared Vault:
1. Click Vaults, Add External Vault
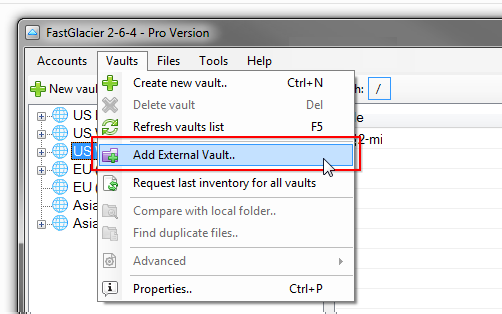
Click Vaults, Add External Vault
Add External Vault dialog will open:
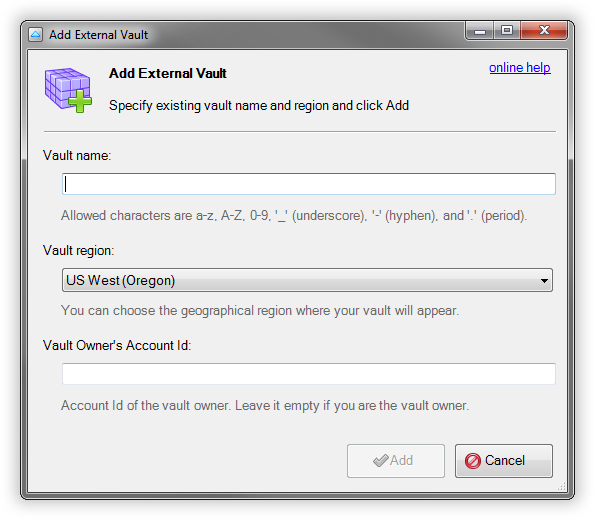
Add External Vault Dialog
2. Fill out the following fields:
-
Vault Name - the name of the vault you want to connect to
-
Vault Region - the region where the vault is located
-
Vault Owner's Account Id - an Account Id of the vault owner
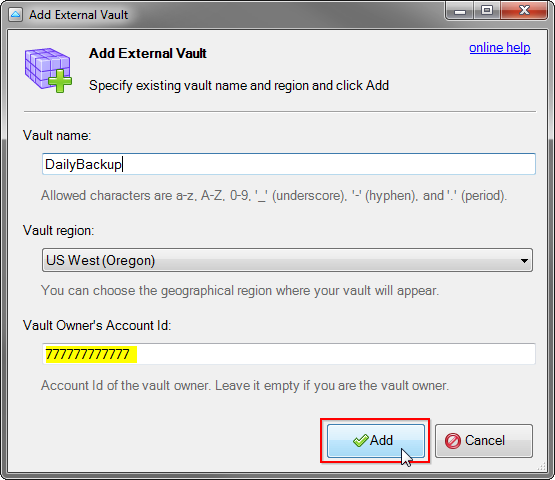
Add External Vault Dialog - filled example
3. Click Add.
Now you can work with the vault according to the permissions provided.
